
API Guide
What is API?
API stands for Application Programming Interface – a software that allows 2 or more computer programs to communicate with each other. These 2 programs are usually referred to as server and client.
-
Server
A server contains information required by a client, can grant access to this information, and performs actions with it.
The server defines how it should be spoken to, what actions it will perform, what information it will give, and its format.
All these details are usually determined in an API specification. For example, here is the API specification for Twitter.
-
Client
A client is a software program that talks to the server to either obtain information or ask the server to perform certain actions.
Clients can be written in any programming language as long as that language can implement the communication standards specified by the server.
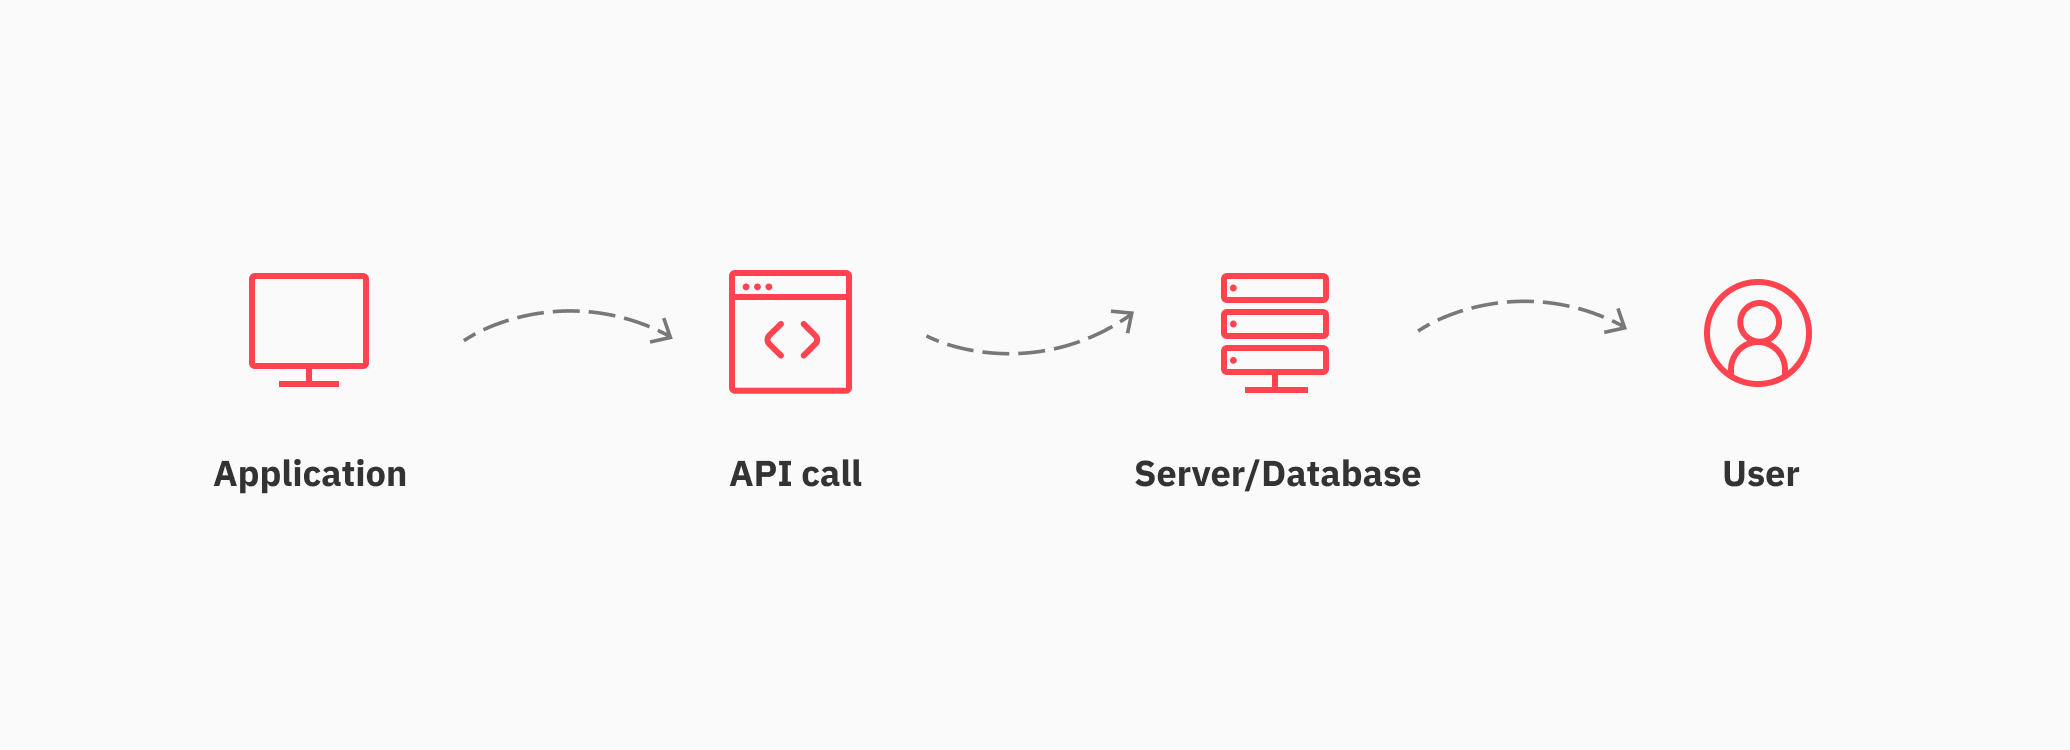
The communication between a server and a client happens with the help of API requests, also known as API calls. The API calls are sent from a client to a server and back. The client and server can be written in different programming languages.
Here is a representation of how an API works:
Client libraries
Client libraries are pre-written pieces of code that can be used to send API calls instead of writing codes from scratch.
Using a client library is optional but highly recommended, as it makes it much easier and efficient to start working with the API.
For example, configuring the correct protocol to talk to the server may require several steps without the client library, but using a ready-made code can shorten the process to just one step.
A client library also makes it easier to adapt to API updates. In many cases, if the API has a significant update, the client library is updated too. The developer of the client that uses API won’t need to make any changes to their code and will just need to update the version of the client library.
The Deriv API
What can you do with the Deriv API?
The Deriv API allows you to perform nearly all functions of the Deriv platforms, since they share the same API. For our CFD platforms (Deriv MT5 and Deriv X), the API functionality is only available for some account management actions.
Our API users typically perform the following activities:
-
Build websites similar to Deriv but with different features.
-
Create desktop apps to execute trades for themselves and their clients.
-
Explore historical tick information.
-
Automate services as payment agents.
How can you earn with Deriv API?
-
You can earn commission on trades and payments your clients perform via the websites and apps you create with Deriv API. Get more details about the commission plans here.
-
You can also earn from markups on every contract purchased via a trading app you created with Deriv API. The markup is defined by you and can be up to 5%.
Here is an example of how the markup is calculated:
To get a payout of 2 USD:
Client stake without markup = 1.07 USD
With the markup (e.g. 2%), a client pays:
Client’s stake with the markup = Stake + (payout x markup)
Client’s stake with the markup = 1.07 USD (2 USD x 2%) = 1.11 USD
Conditions of using the Deriv API
The Deriv API is free of charge and is subject to our terms and conditions and copyright.
Should you run into any difficulties using it or if you need assistance, please contact us via one of our support forums or via email.
Technical specifications of the Deriv API
It is only possible to communicate with the Deriv API using WebSockets; it does not support other protocols. Any data passed to the Deriv API should be in JSON format, while the comprehensive all-in-one client library is available in JavaScript and Python.
WebSockets
The WebSockets protocol is an advanced version of the communication channel that is available in all popular programming languages. It allows the server to send information to the client and maintain the connection without the client requesting it every time.
In comparison, APIs using REST over HTTP don’t maintain a connection to the client once the server has replied to it.
The WebSockets protocol provides clients with a faster and more efficient way to receive updated information as soon as it becomes available. For example, you can subscribe to account balance updates and the Deriv servers will send the new balance to your client in real time.
A client can also subscribe and receive several types of different information simultaneously over a single connection.
For more information on how to write a client using WebSockets, visit this guide.
JSON
JavaScript Object Notation (JSON) is a data format based on JavaScript. However, it is completely language-independent, and can be used by any modern programming language. JSON has a good balance between being readable by humans and by machines, making it both user-friendly and computer-efficient.
Here is an example of the JSON formatted code, where “ticks” is the name of the attribute and “R_100” is the value of that attribute.
{
    "ticks": "R_100"
}
Data in JSON can also be nested, so if you wanted to send user information with an address, it could look like:
{
    "name": "Michael",
    "address": {
        "street_number": 10,
        "street_name": "Fairy Drive",
        "city": "Melbourne",
        "country": "Australia"
    }
}
When you are writing an API client, you will write something like print address.street_number
(depending on the programming language) to print the street number.
This nesting can have as many levels as required to convey the information.
For example, when we send information about account status, it requires several levels to print information about the manual Identity service status:
print authentication.identity.services.manual
{
    "get_account_status": {
        "authentication": {
            "attempts": {
                "count": 0,
                "history": [],
                "latest": {}
            },
            "document": {
                "status": "none"
            },
            "identity": {
                "services": {
                    "idv": {
                        "last_rejected": [],
                        "reported_properties": {},
                        "status": "none",
                        "submbissions_left": 0
                    },
                    "manual": {
                        "status": "none"
                    },
                }
            }
        }
    }
}
JSON Schemas
JSON Schema is a defined format for the JSON messages used to describe their structure to Deriv API users. In a nutshell, it’s a standardised way of explaining what a JSON request should look like using JSON itself.
Here is an example of the part of the JSON Schema that is used to tell developers what to send when they request the balance of an account:
{
    "required": [
        "balance"
    ],
    "properties": {
        "balance": {
            "description": "Must be `1`",
            "type": "integer",
            "enum": [
                1
            ]
        },
        "account": {
            "description": "[Optional] If set to `all`, return the balances of all accounts one by one; if set to `current`, return the balance of current account; if set as an account id, return the balance of that account.",
            "type": "string",
            "pattern": "^(current|all|[A-Z]{2,4}[0-9]{1,10})$",
            "default": "current"
        }
    }
}
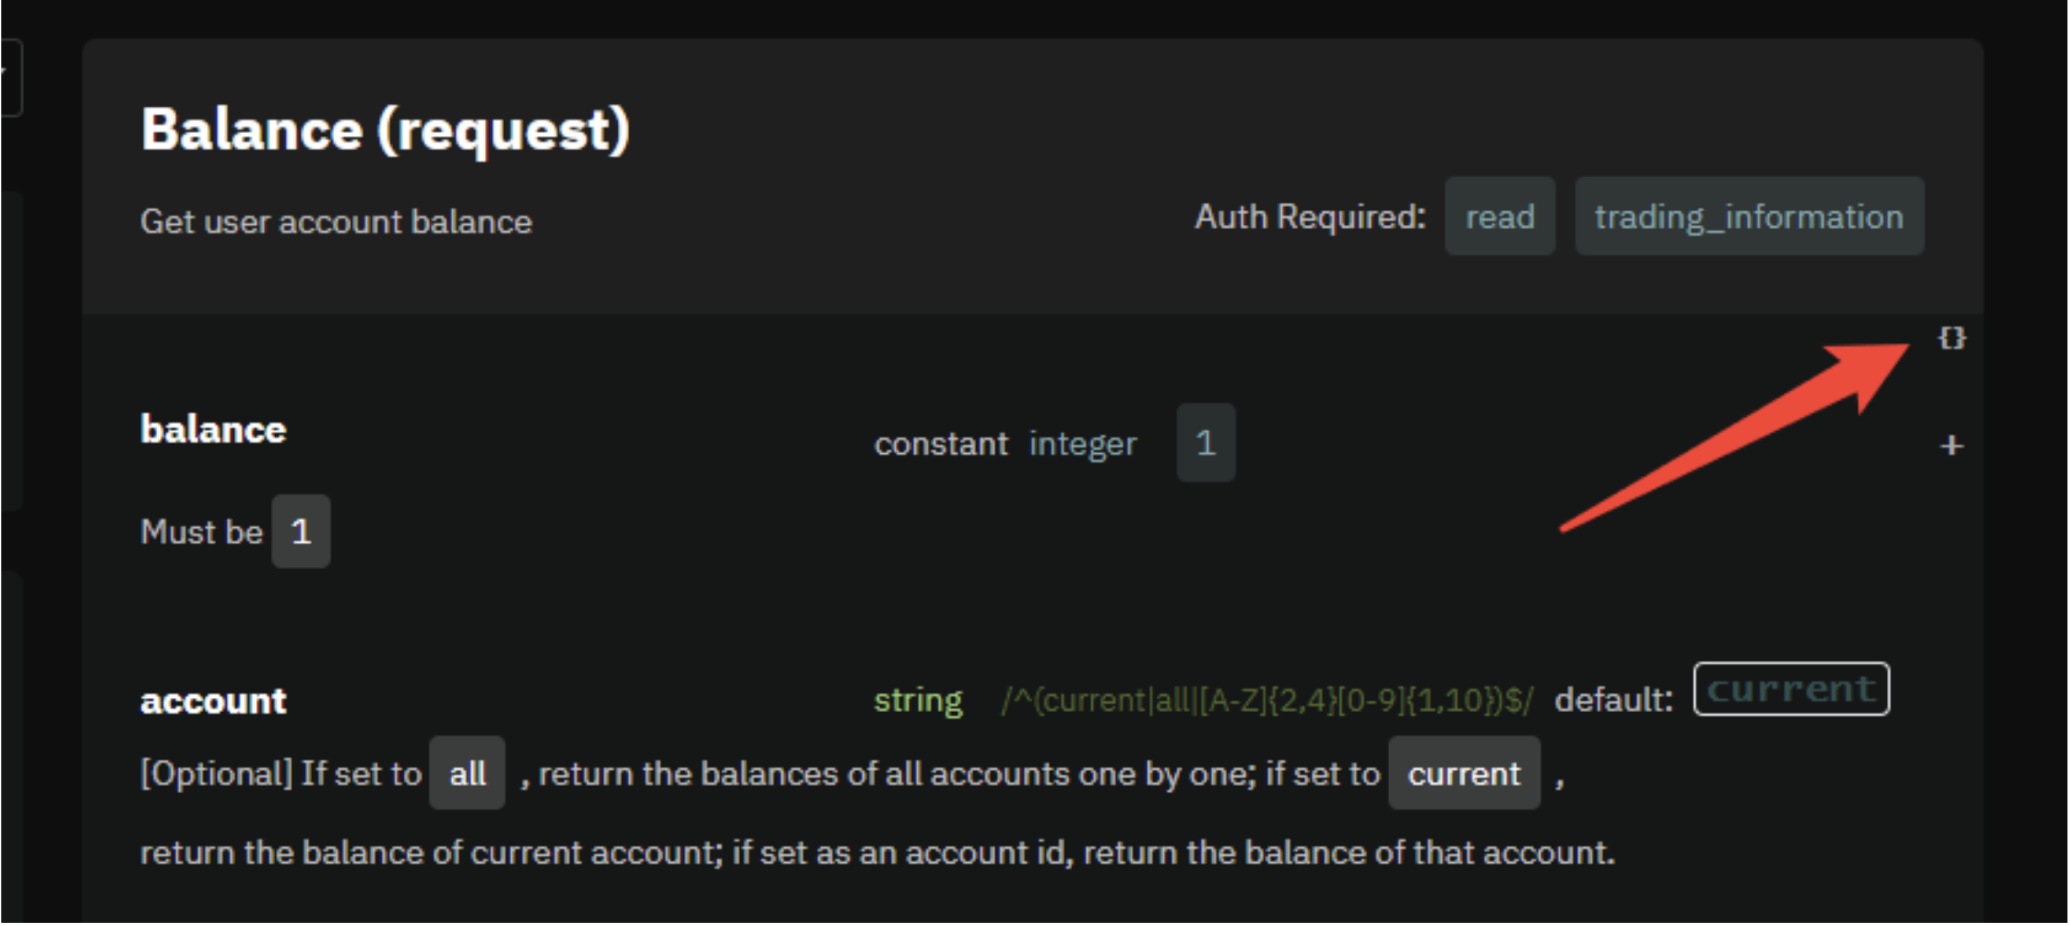
You can see that the balance is a required attribute, the value must equal 1, and the account is an optional attribute. But if you choose to send it, it must be a string (word) and has to match the described pattern.
JSON Schemas on Deriv are divided into schemas we accept (request) and schemas we send (response). You can find the detailed JSON schemas for each API call on our API Explorer.
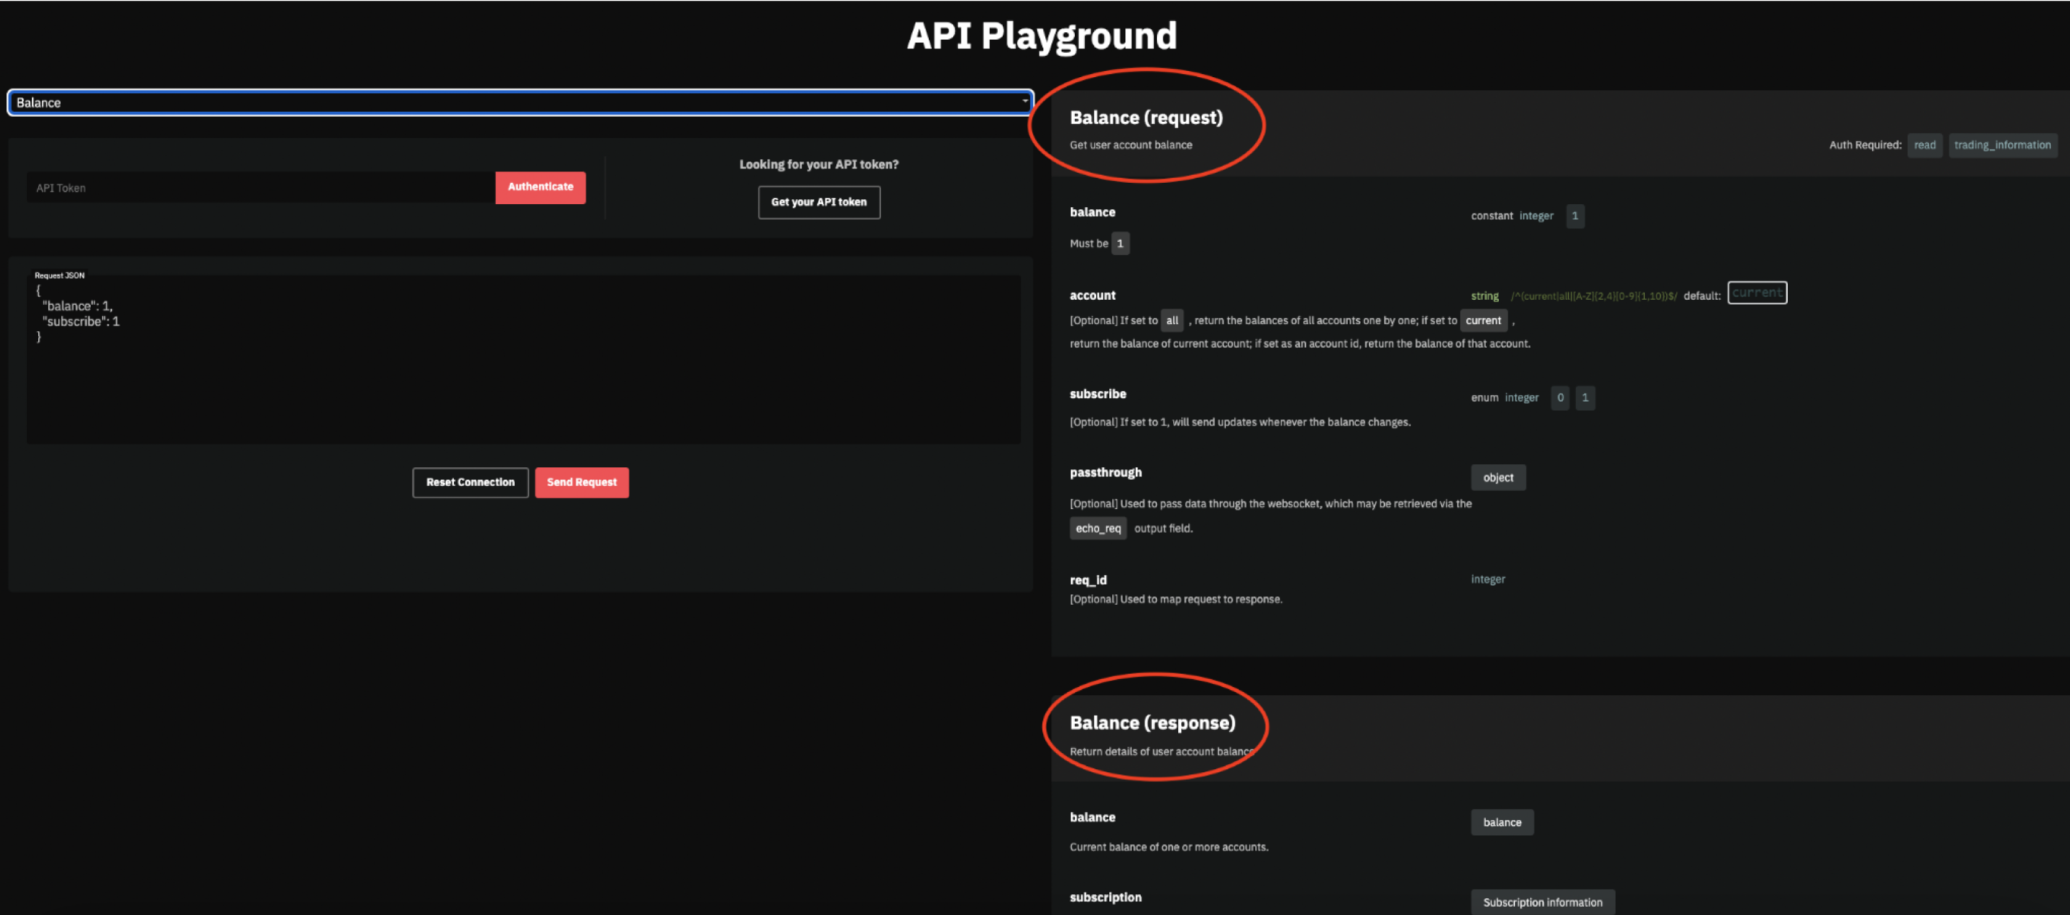
To see the raw JSON schemas, click on the braces within each call.
The JSON Schema also forms the documentation for the API Explorer.
Authorisation
Third-party developers can authorise calls to the API in two different ways: via API token or via OAuth2.
API token
An API token is a unique identifier of a client that requests access from a server. It’s the simplest way of authorisation.
The Deriv API token has to be generated by a client here, along with setting the appropriate access level.
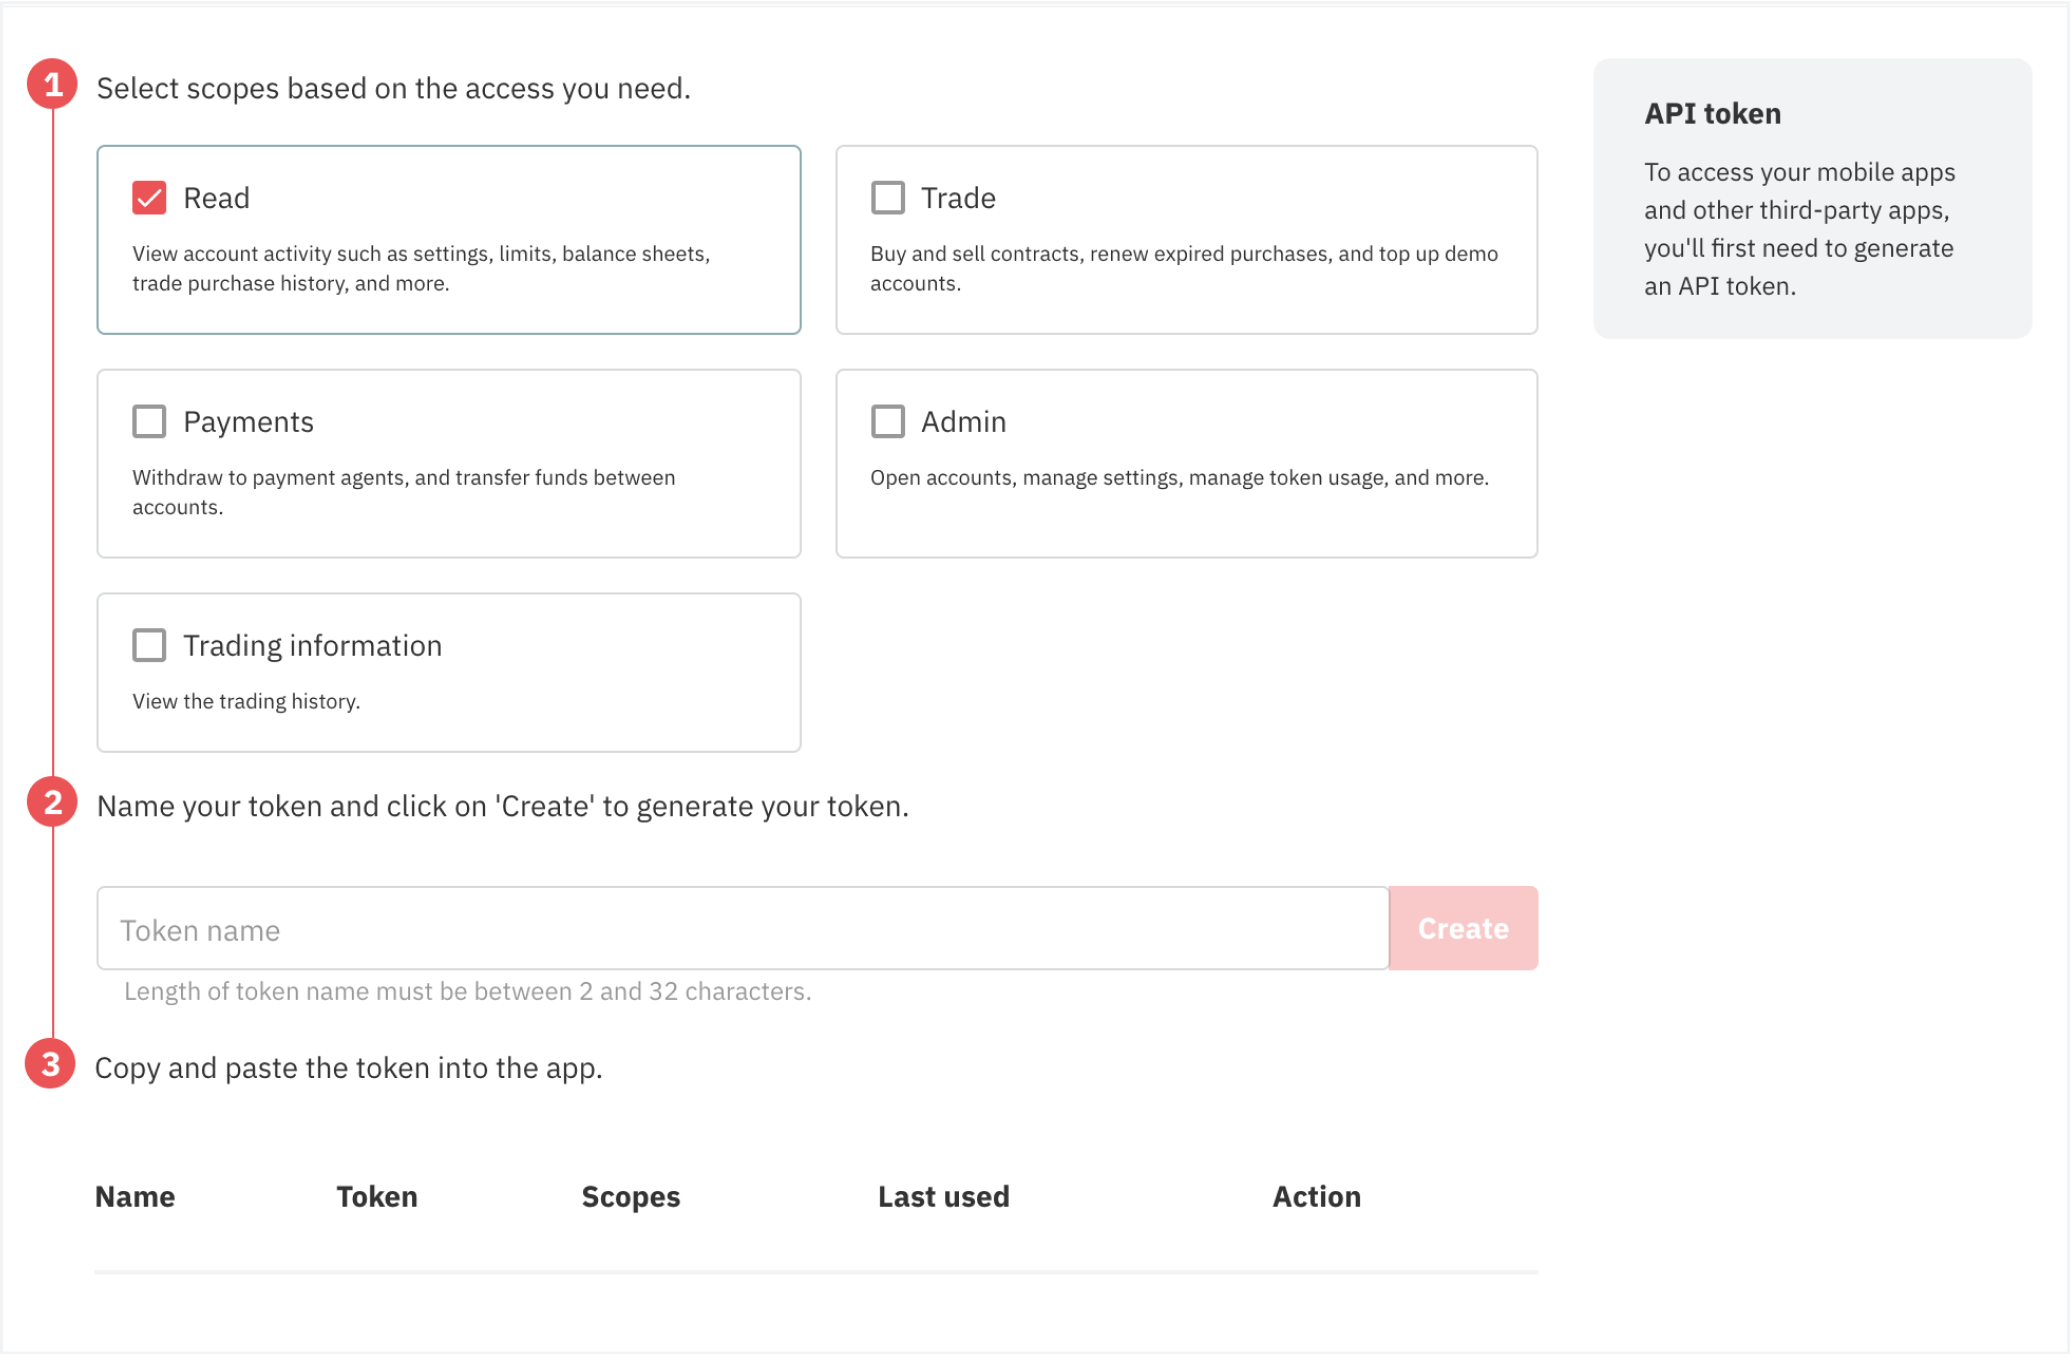
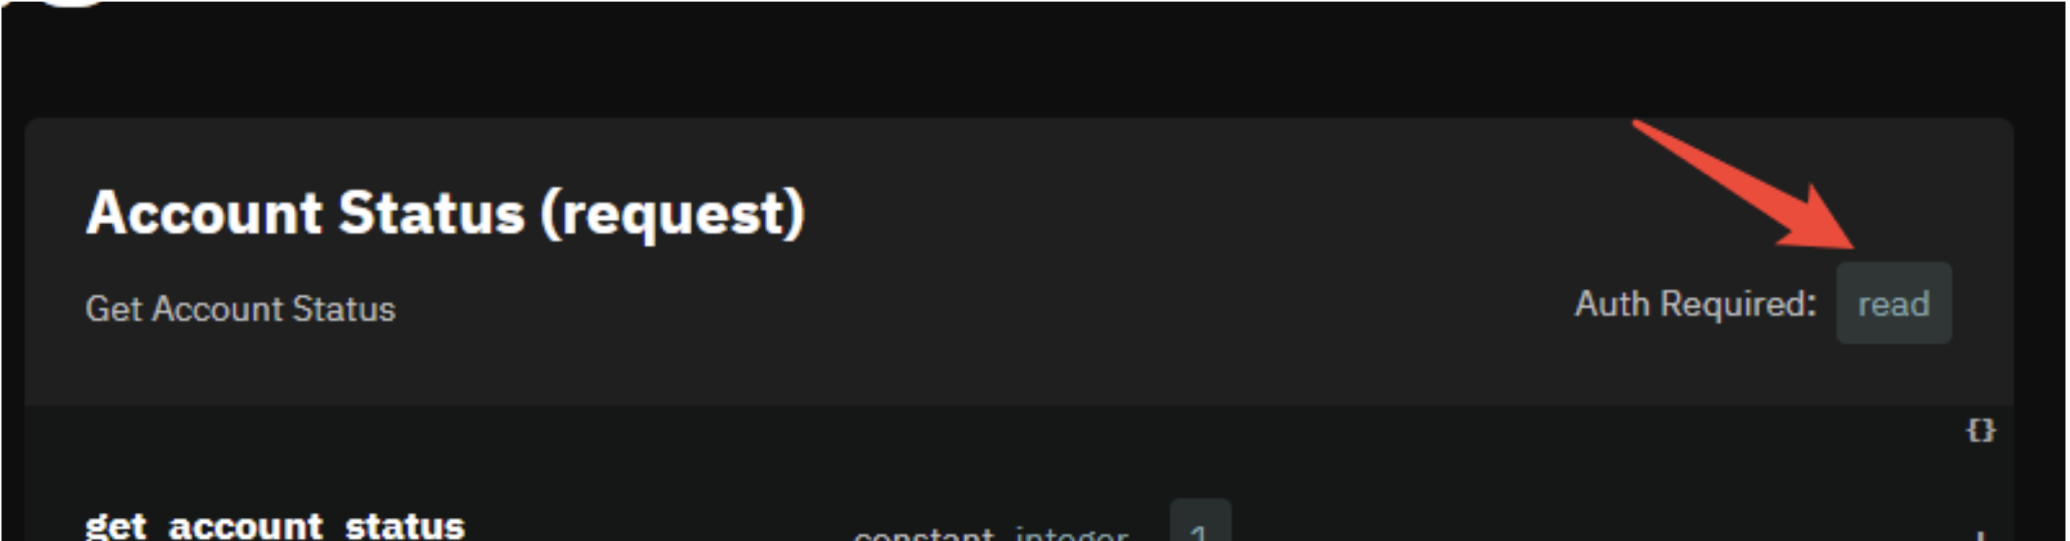
The access level for each API token has to match the required access level of each API call, which can be found in the API Explorer as well.
For example, on the screenshot below, you can see that to be able to use the Account Status, a token with read access level must be used.
Following the authorisation of a WebSocket connection, subsequent calls on that connection will be considered user actions.
Please bear in mind that the API token can be used with any app, so both your app and your clients need to keep it secure.
OAuth2
OAuth stands for Open Authorisation – a protocol that allows a client access resources hosted on a server on behalf of the user without revealing the credentials.
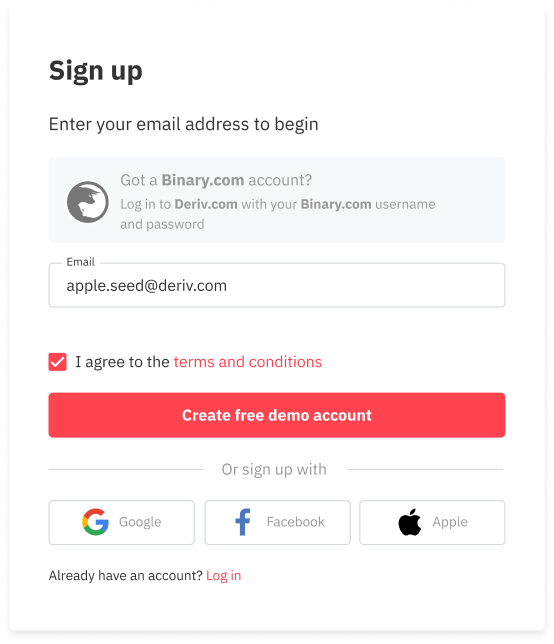
This type of authorisation allows clients to log in to third-party apps using their Deriv accounts without creating an API token. In this case, the third-party app does not see the user's password or permanent API token, which makes it safer.
The OAuth2 authentication requires more steps to set up, but it is the safest way for developers to share access to their app with their clients.
For more information on OAuth2, visit this guide.
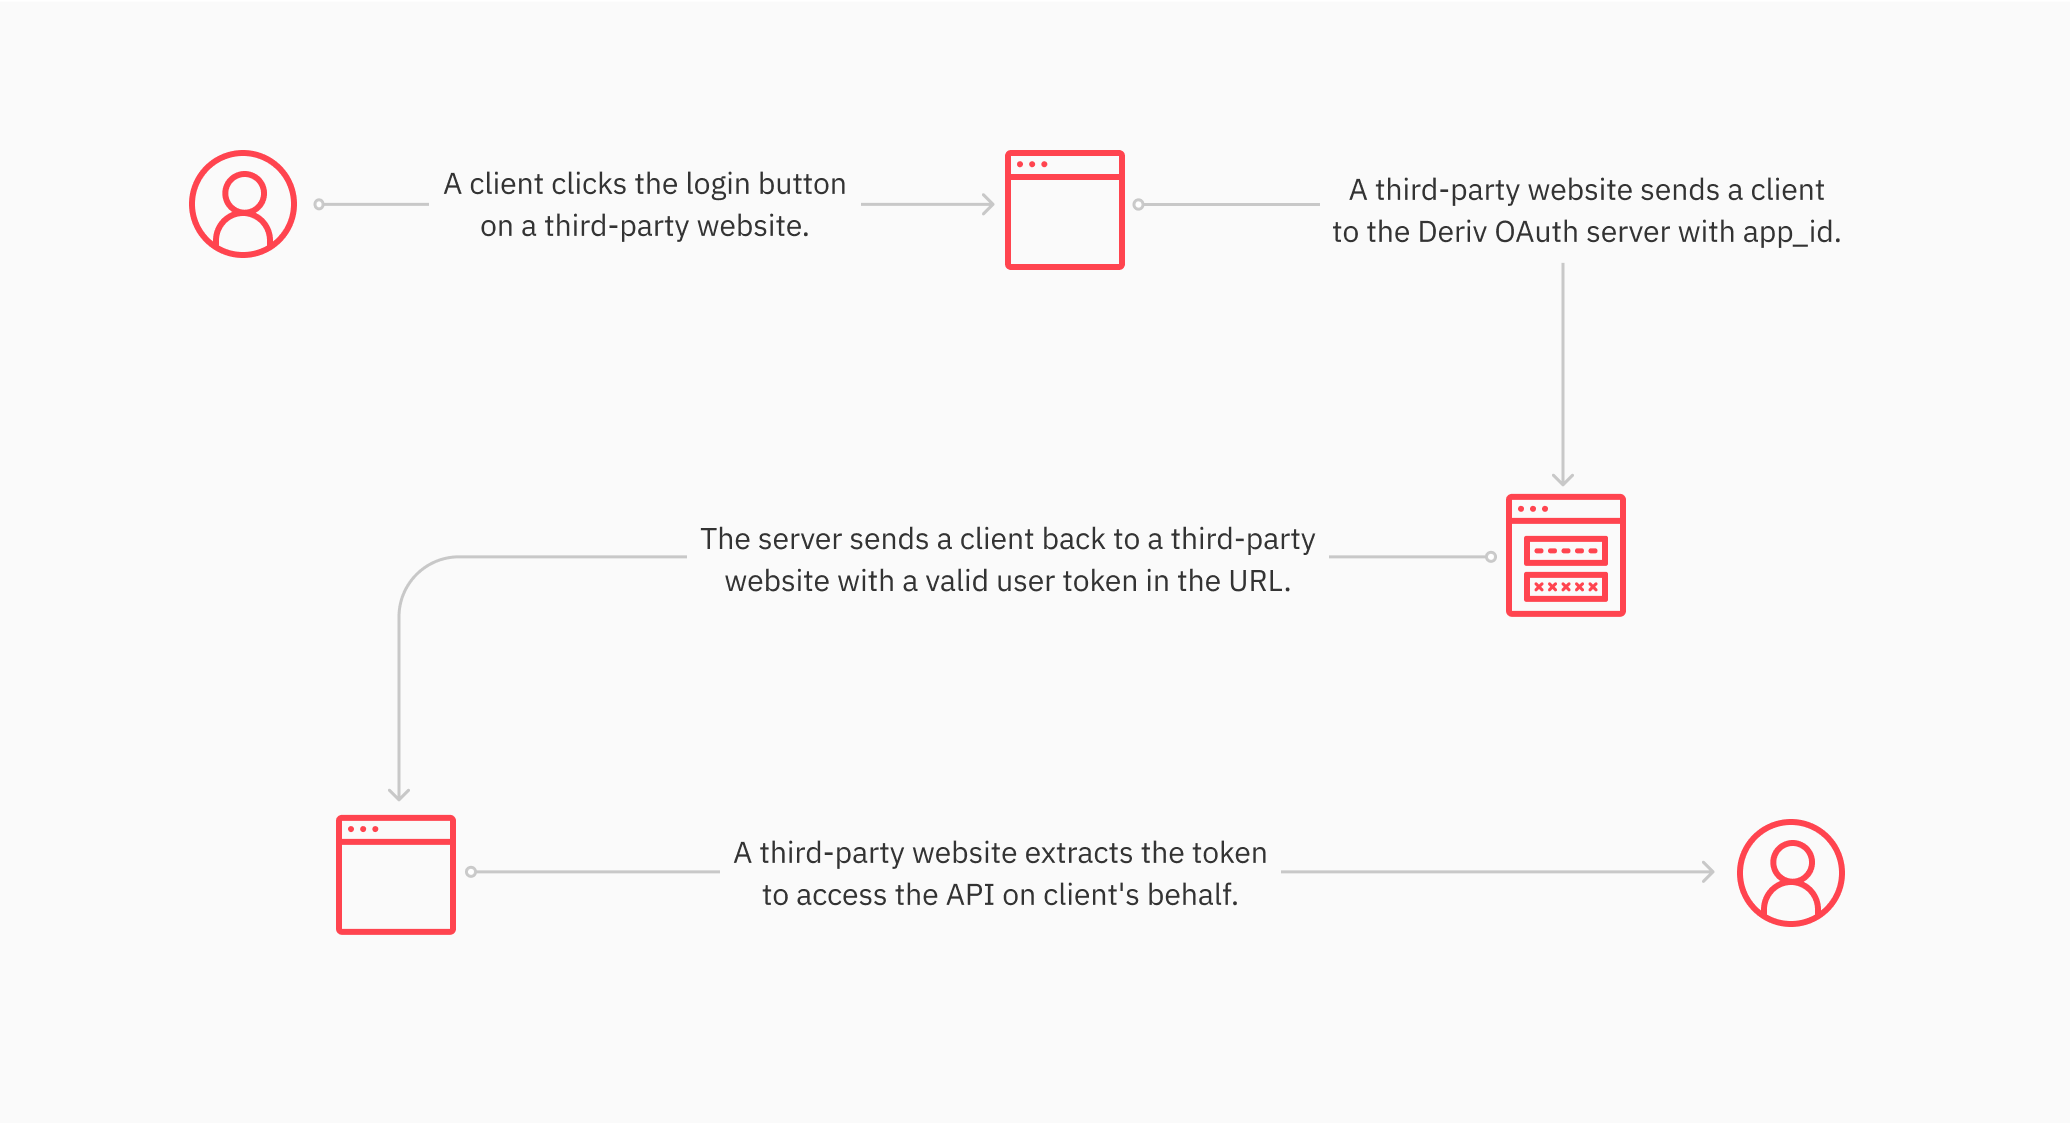
Here is the visual representation of how the OAuth authorisation connection works:
What do you need to do to use OAuth authorisation for Deriv API?
-
Specify the URL that will be used as the OAuth Redirect URL on the API registration page in the ‘Website URL' field.
-
Add a login button on your website or app and direct users to https://oauth.binary.com/ oauth2/authorize? app_id=your_app_id where your_app_id is the ID of your app.
Once a user signs up, they will be redirected to the URL that you entered as the Redirect URL. This URL will have arguments added to it with the user's session tokens, and will look similar to this:
https://mywebsite.com/redirect/?acct1=cr799393& token1=a1-f7pnteezo4jzhpxclctizt27hyeot&cur1=usd& acct2=vrtc1859315& token2=a1clwe3vfuuus5kraceykdsoqm4snfq& cur2=usd&state=
In the parameters of the URL you will see all the accounts and the session token for each account.
-
Pass these tokens to the Authorize API call in order to perform actions on behalf of the account.
Performing trades via Deriv API
You can perform a simple contract purchase with a code from our list of examples on the quick start page.
However, while the simple example will work for most cases, it does not perform any checks to see if the asset is available for purchase or show the potential payout if they proceed with the purchase.
To receive this additional information, you can perform several steps once you are authorised and before purchasing the contract.
-
Call Active Symbols to get the list of active symbols.
-
Call Contracts For Symbol to see what contracts can be purchased.
-
Call Price Proposal to get the current payout level for the contract. Setting "subscribe": 1 gives regular updates.
-
Call Buy Contract with the ID given in the Price Proposal to open a trade. Note the contract_id from the response. Setting “subscribe” : 1 will send you updates on the contracts status as Proposal Open Contract responses.
-
Monitor the “is_sold” attribute of the Proposal Open Contract response to see when the contract is finished. Once the contract is finished, you can check the “status” attribute to see if the contract has been won or lost.
Table mapping
Deriv website contract types to API parameter names
If you would like to copy certain contract types from our websites, the following table will describe how the contract type is referred to using the API.
| API contract name | Category on website | Name on website |
|---|---|---|
| MULTUP | Multiply Up/Multiply Down | Multiply Up |
| MULTDOWN | Multiply Up/Multiply Down | Multiply Down |
| UPORDOWN | Stays Between/Goes Outside | Goes Outside |
| EXPIRYRANGE | Ends Between/Ends Outside | Ends Between |
| ONETOUCH | Touch/No Touch | Touches |
| CALLE | Rise/Fall Equal | Higher |
| LBHIGHLOW | Lookbacks | High-Low |
| ASIAND | Asians | Asian Down |
| EXPIRYRANGEE | ||
| DIGITDIFF | Digits | Digit Differs |
| DIGITMATCH | Digits | Digit Matches |
| DIGITOVER | Digits | Digit Over |
| PUTE | Rise/Fall Equal | Lower |
| DIGITUNDER | Digits | Digit Under |
| NOTOUCH | Touch/No Touch | Does Not touch |
| CALL | Up/Down | Higher |
| RANGE | Stays Between/Goes Outside | Stays Between |
| LBFLOATPUT | Lookbacks | High-Close |
| DIGITODD | Digits | Digit Odd |
| PUT | Up/Down | Lower |
| ASIANU | Asians | Asian Up |
| LBFLOATCALL | Lookbacks | Close-Low |
| EXPIRYMISSE | ||
| EXPIRYMISS | Ends Between/Ends Outside | Ends Outside |
| DIGITEVEN | Digits | Digit Even |
| TICKHIGH | highlowticks | High Tick |
| TICKLOW | highlowticks | Low Tick |
| RESETCALL | Reset Call/Reset Put | Reset Call |
| RESETPUT | Reset Call/Reset Put | Reset Put |
| CALLSPREAD | Call Spread/Put Spread | Call Spread |
| PUTSPREAD | Call Spread/Put Spread | Put Spread |
| RUNHIGH | Only Ups/Only Downs | Only Ups |
| RUNLOW | Only Ups/Only Downs | Only Downs |